Prerequisites
Before you begin, ensure:
You have access to your SFTP server credentials
You have the required file path and login details (host, port, username, and authentication method)
Step 1: Open sysConnector
Navigate to https://app.sysconnector.com/
Log in to your sysConnector account.
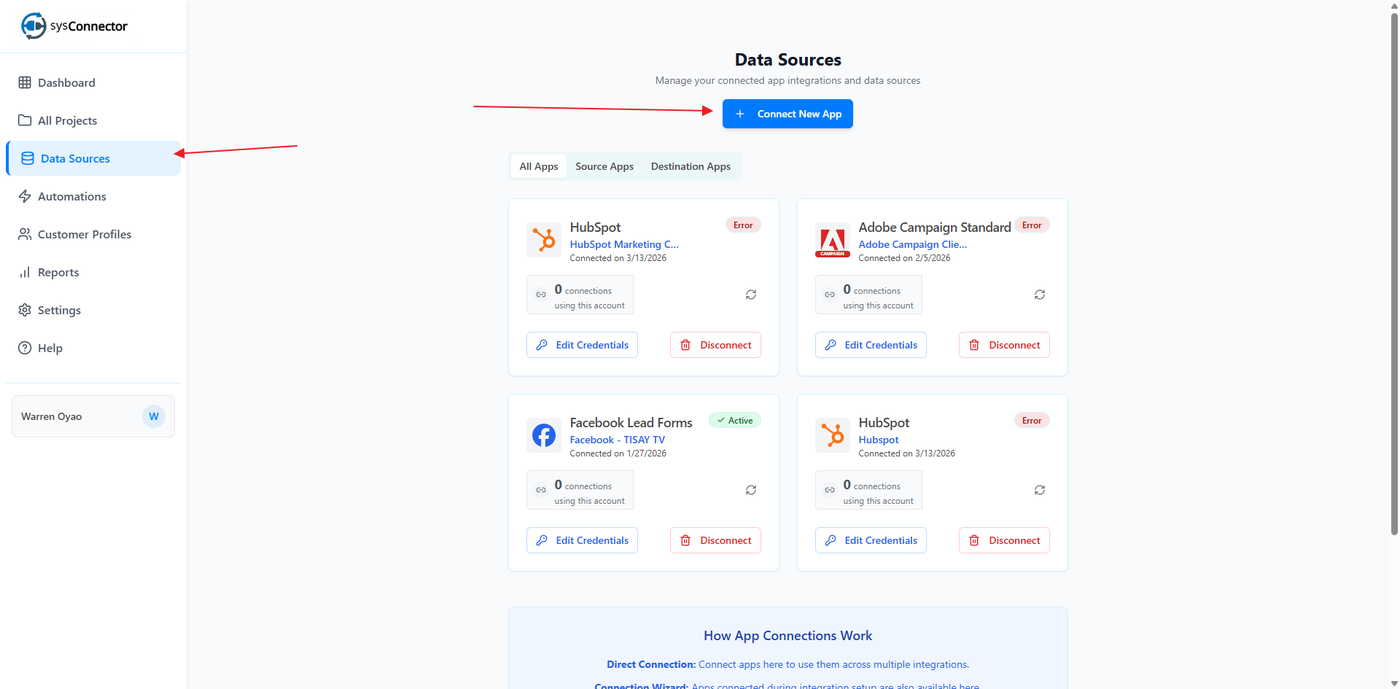
Step 2: Open Data Sources
Click Data Sources from the left-hand menu.
Click Connect New App.
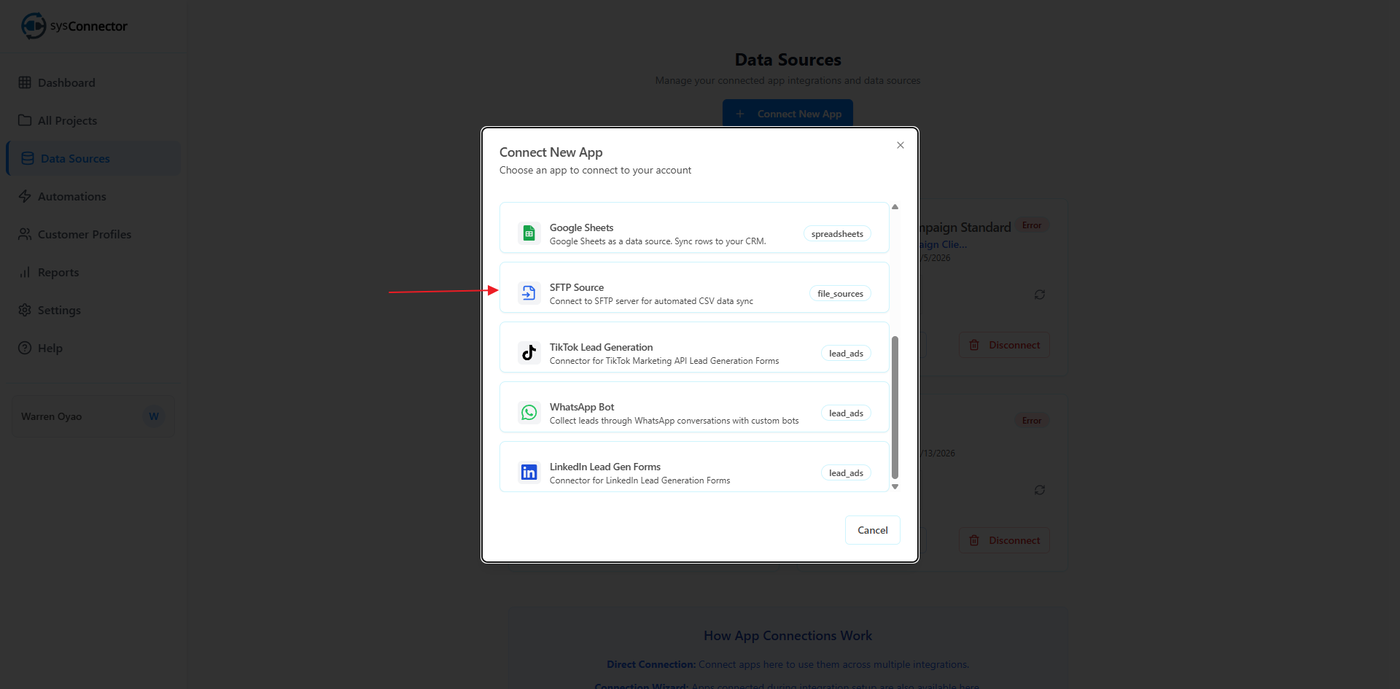
Step 3: Select SFTP
From the list of available integrations, select SFTP
Step 4: Enter SFTP Connection Details
In the connection screen, fill in the following:
Account Name *
Example: Main SFTP Server
Give this connection a memorable name
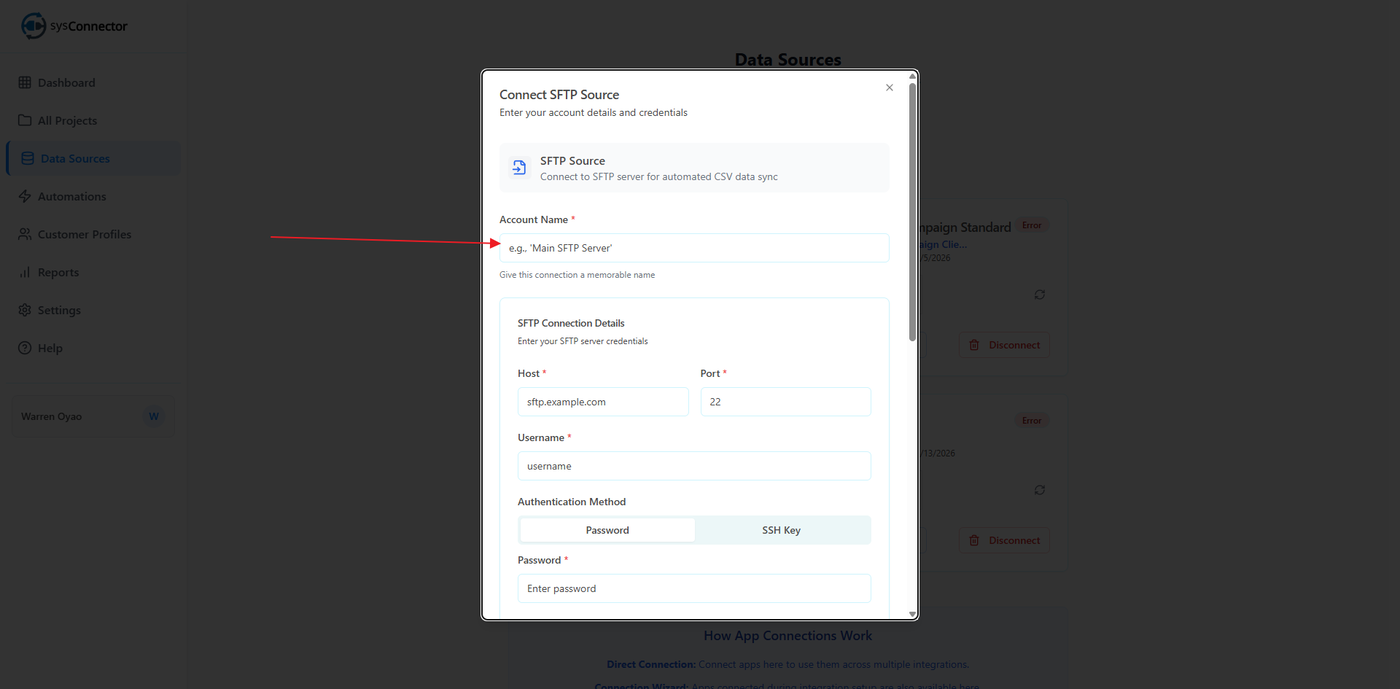
SFTP Connection Details
Enter your SFTP server credentials:
Host *
Example:
sftp.example.com
Port *
Default:
22
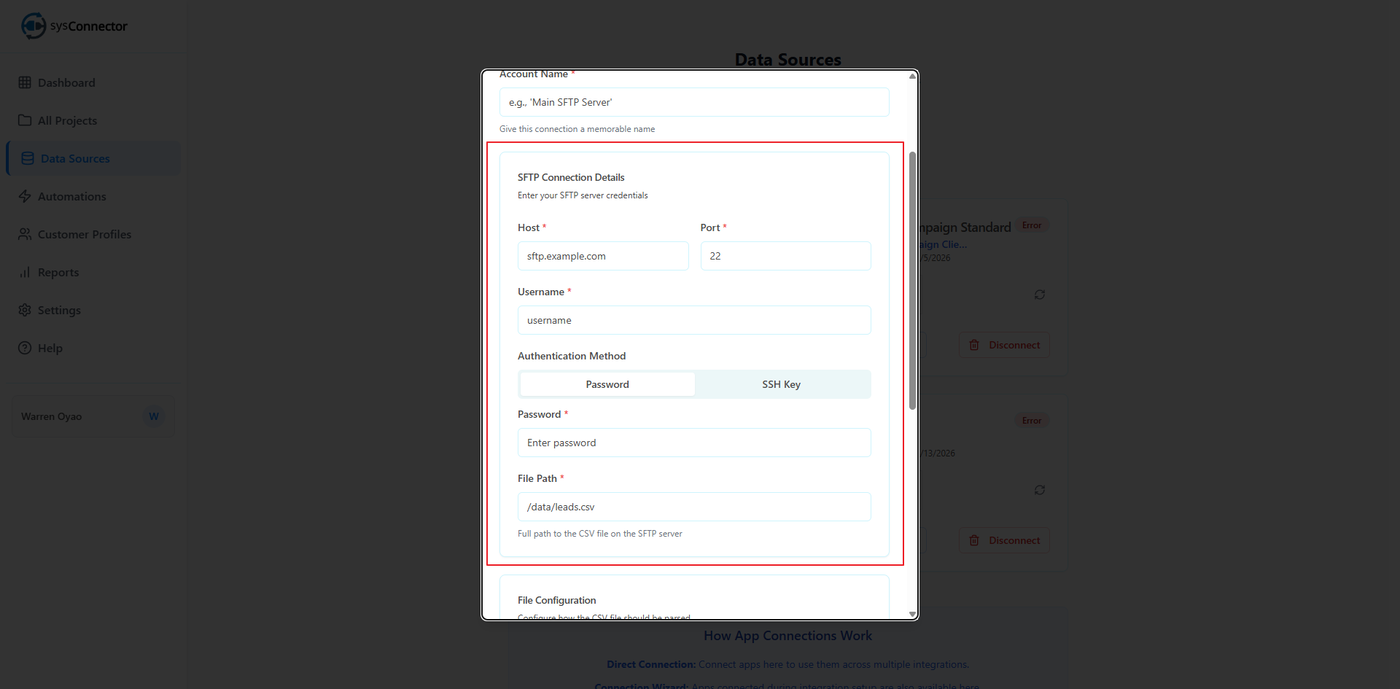
Username *
Example:
test@omnifyx.com
Authentication Method
Select one:
Password
SSH Key
Password *
Enter your SFTP password (if using Password authentication)
File Path *
Example:
/data/leads.csvFull path to the CSV file on the SFTP server
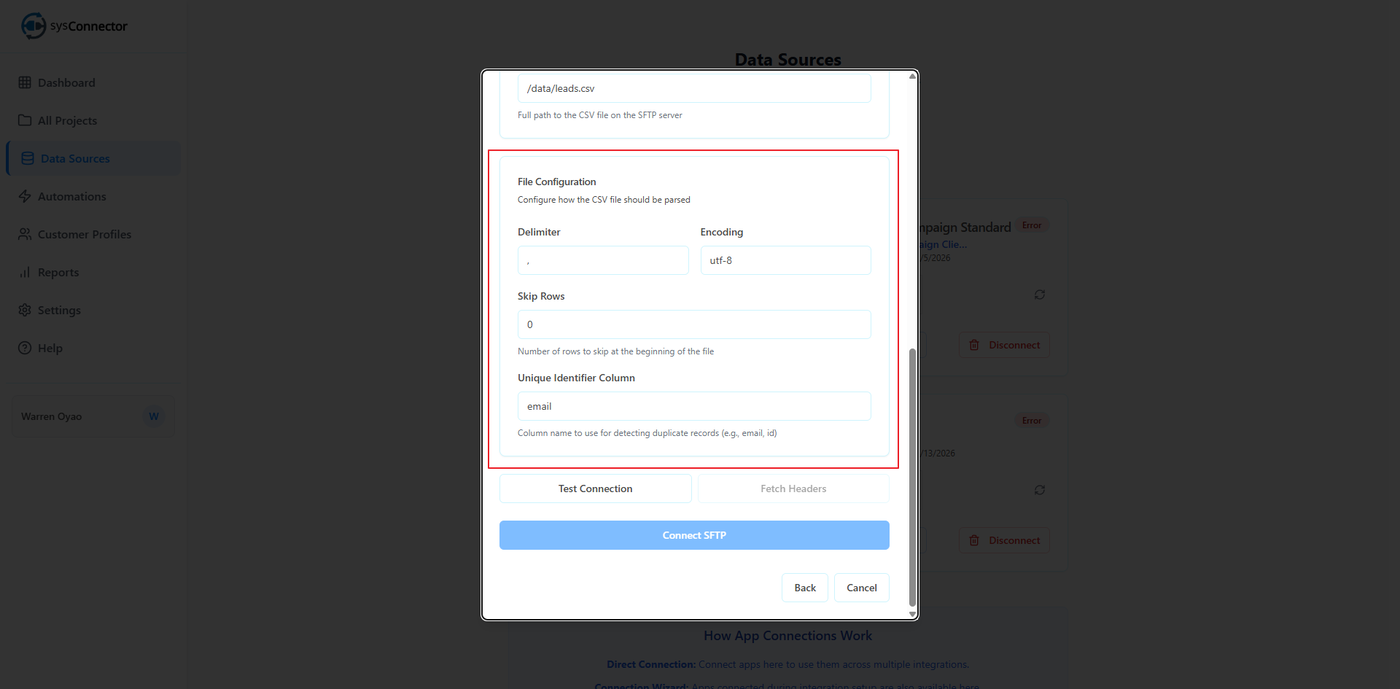
File Configuration
Configure how the CSV file should be parsed:
Delimiter
Example:
,
Encoding
Example:
utf-8
Skip Rows
Example:
0Number of rows to skip at the beginning of the file
Unique Identifier Column
Example:
emailColumn name used to detect duplicate records (e.g., email, id)
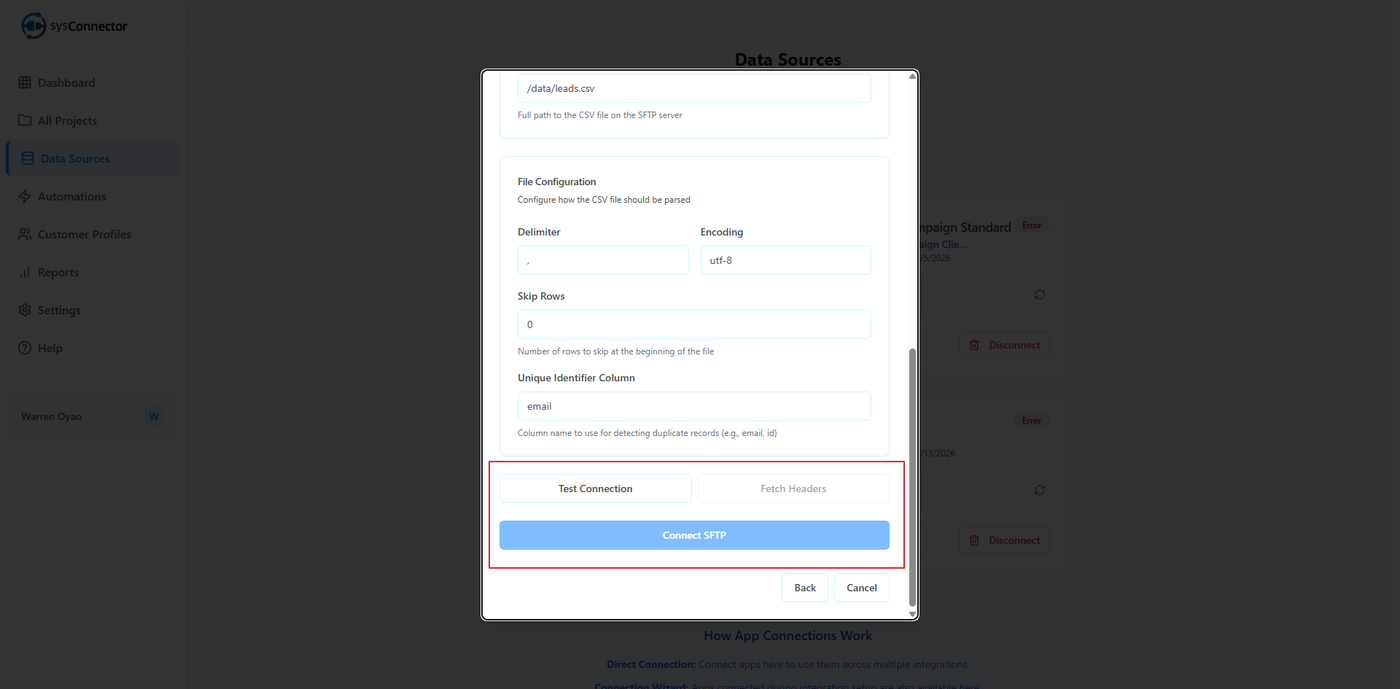
Available Actions
Follow these steps to complete the setup:
Test Connection – Click this first to verify that your SFTP credentials and connection details are correct
Fetch Headers – Once the connection is successful, click this to retrieve the column headers from your CSV file
Connect SFTP – After confirming the headers, click this to complete the connection
Step 5: Confirm Connection
You will see a success message:
App Connected – Your app has been connected successfully
Your SFTP integration is now active.
You’re All Set!
sysConnector is now connected to your SFTP server, and your data will begin syncing automatically.