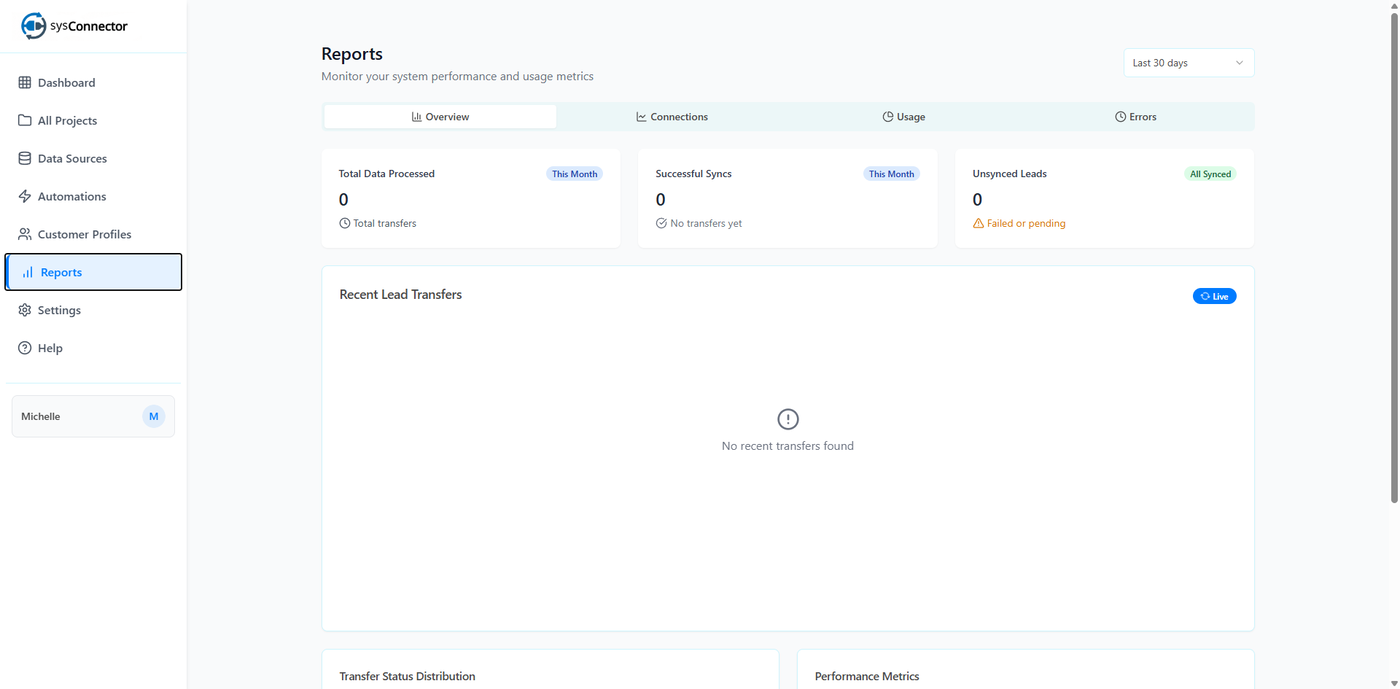

This guide walks you through the complete process of connecting a WhatsApp Bot (Source) to HubSpot (Destination) using the sysConnector platform. Once configured, user responses collected via WhatsApp will sync automatically into HubSpot.
Prerequisites
Make sure you have the following:
Twilio Credentials:
Account SID
Auth Token
WhatsApp Business Number
HubSpot Credentials:
Private App Access Token
Step 1: Create a New Connection
Log in to the sysConnector.
Click Create Connection.
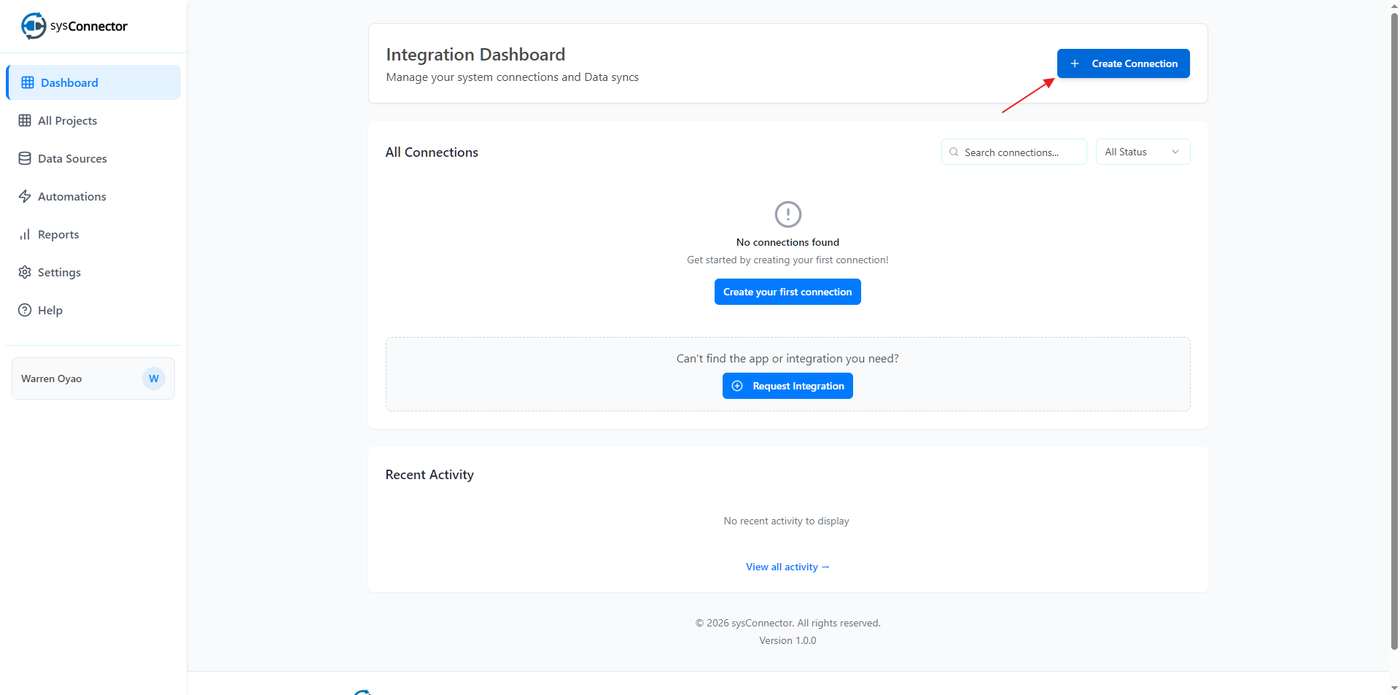
If your app is missing, click Request Integration to notify the sysConnector team.
Step 2: Configure WhatsApp Bot as the Source
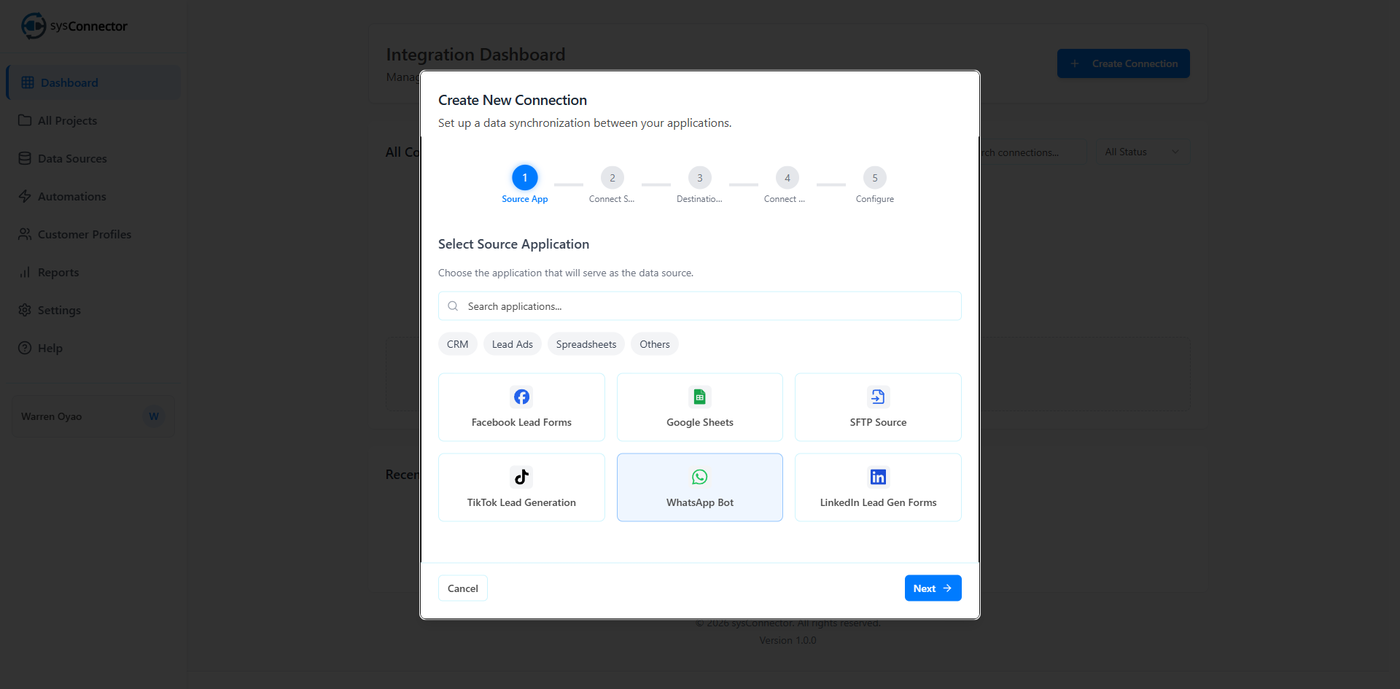
Select WhatsApp Bot
Choose WhatsApp Bot from the app list
Click Next
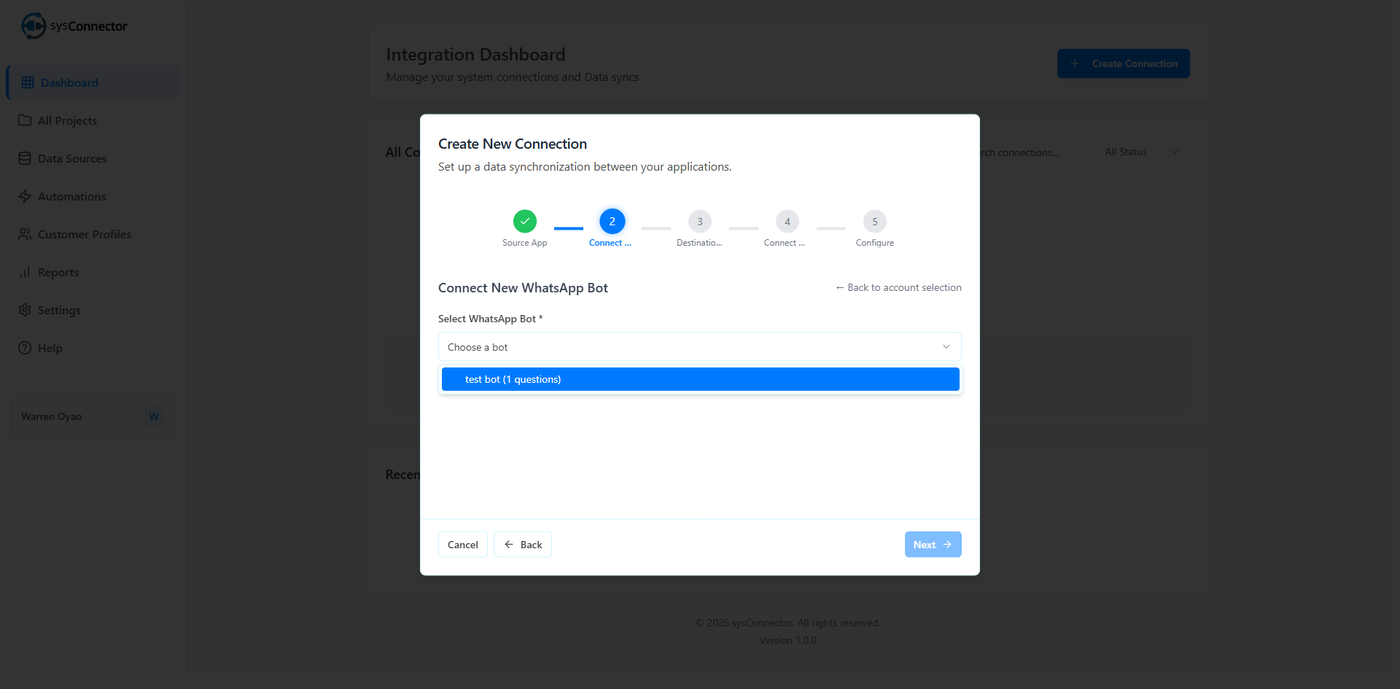
Choose a bot
Select which bot to use for this connection from the dropdown
Click Next
How to Create a WhatsApp Bot Automation
Go to the Automation tab in sysConnector
Click WhatsApp Bot → Create WhatsApp Bot
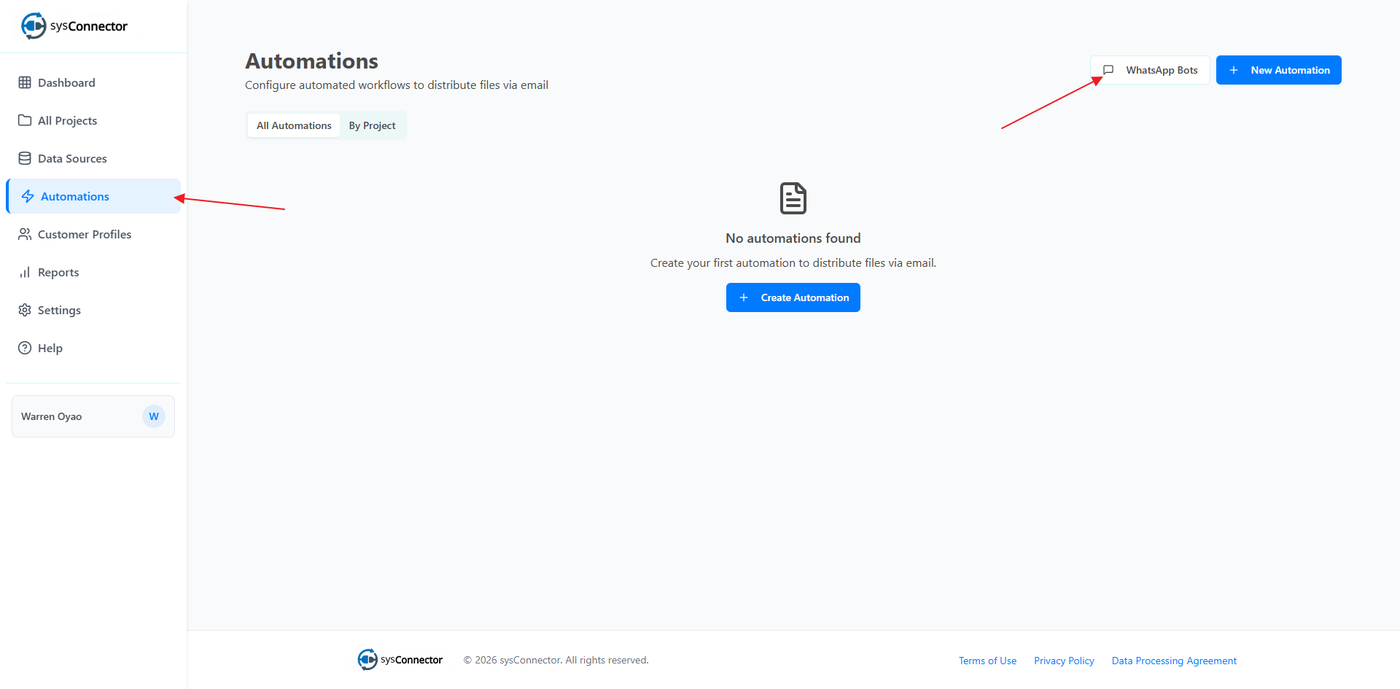
Fill in the bot details:
Bot Name
Welcome Message
Thank You Message
Add your questions:
Question Text
Field Name (use lowercase and underscores only)
Field Type (e.g., text, number, email)
Required (Yes/No)
Add as many questions as needed
Click Create to finish the bot automation
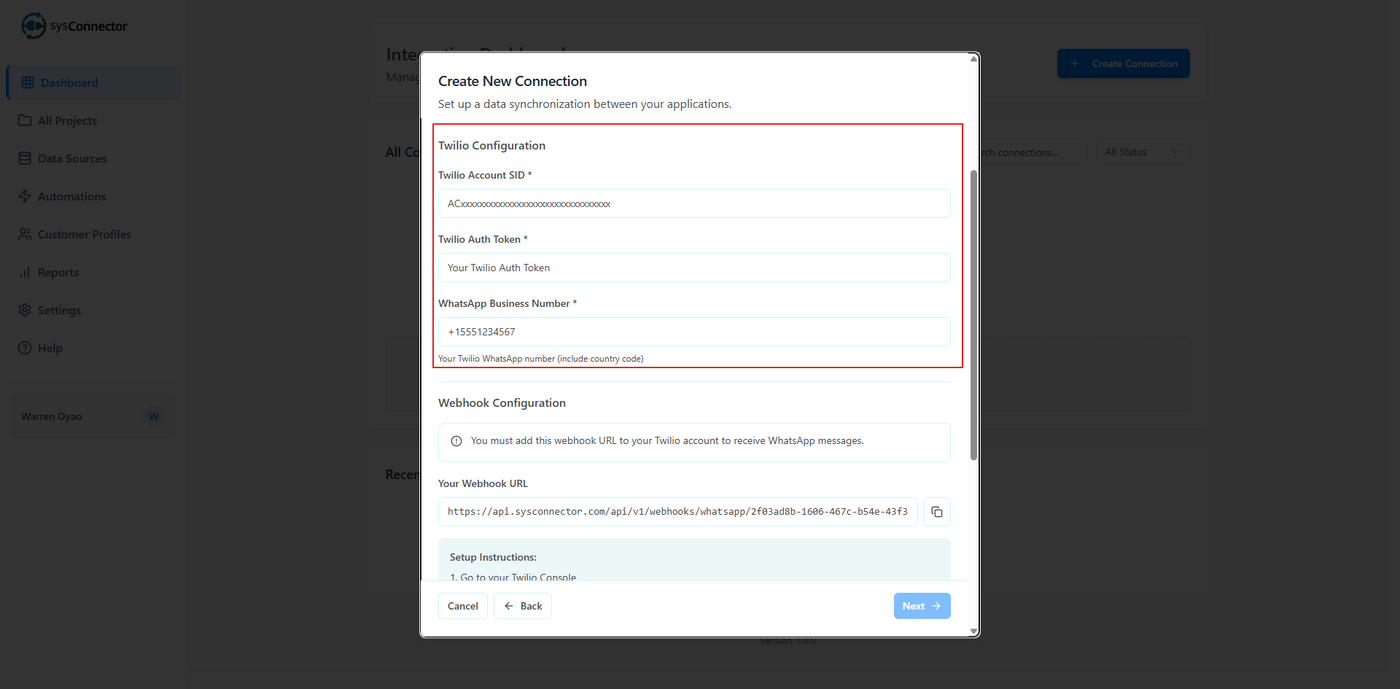
Enter Twilio Configuration
You will need to provide:
Twilio Account SID
Twilio Auth Token
WhatsApp Business Number
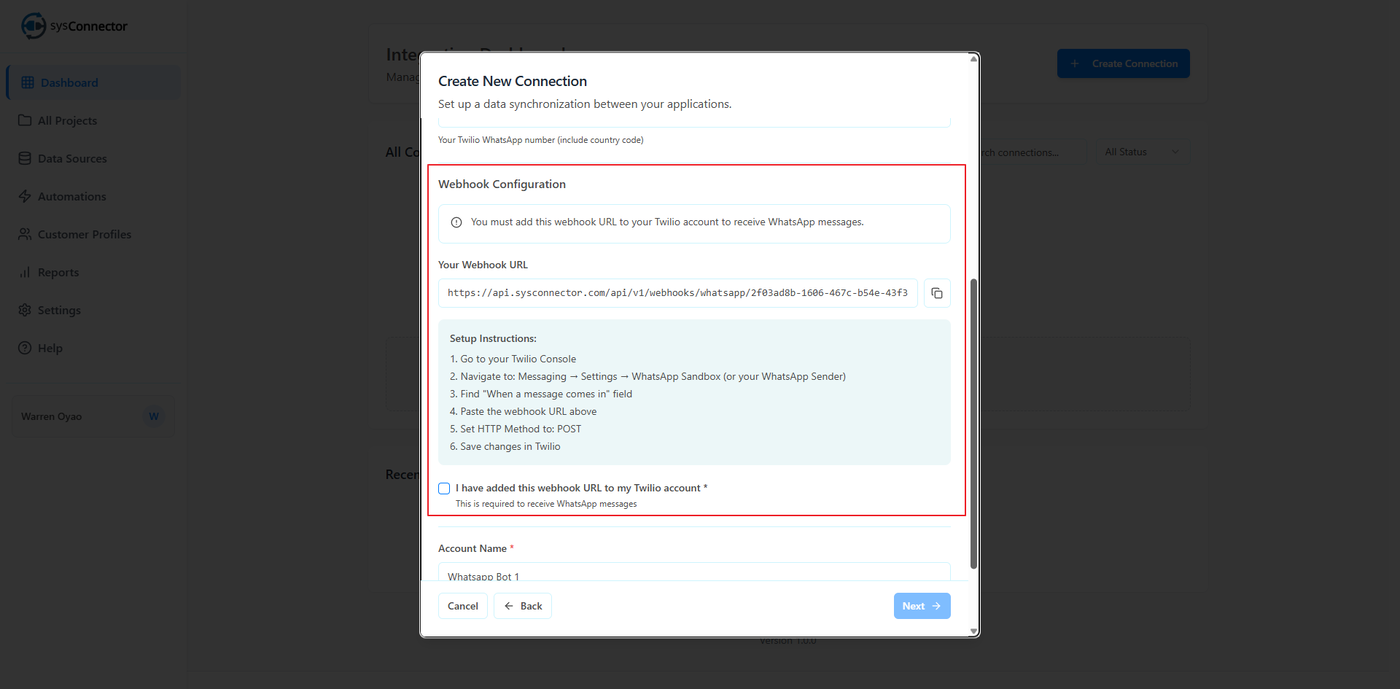
Webhook URL
Webhook Setup Instructions:
Log in to your Twilio Console
Navigate to Messaging → Settings → WhatsApp Sandbox (or your WhatsApp Sender)
Find the "When a message comes in" field
Paste your Webhook URL
Set HTTP Method to POST
Click Save
Check the box “I have added this webhook URL to my Twilio account”
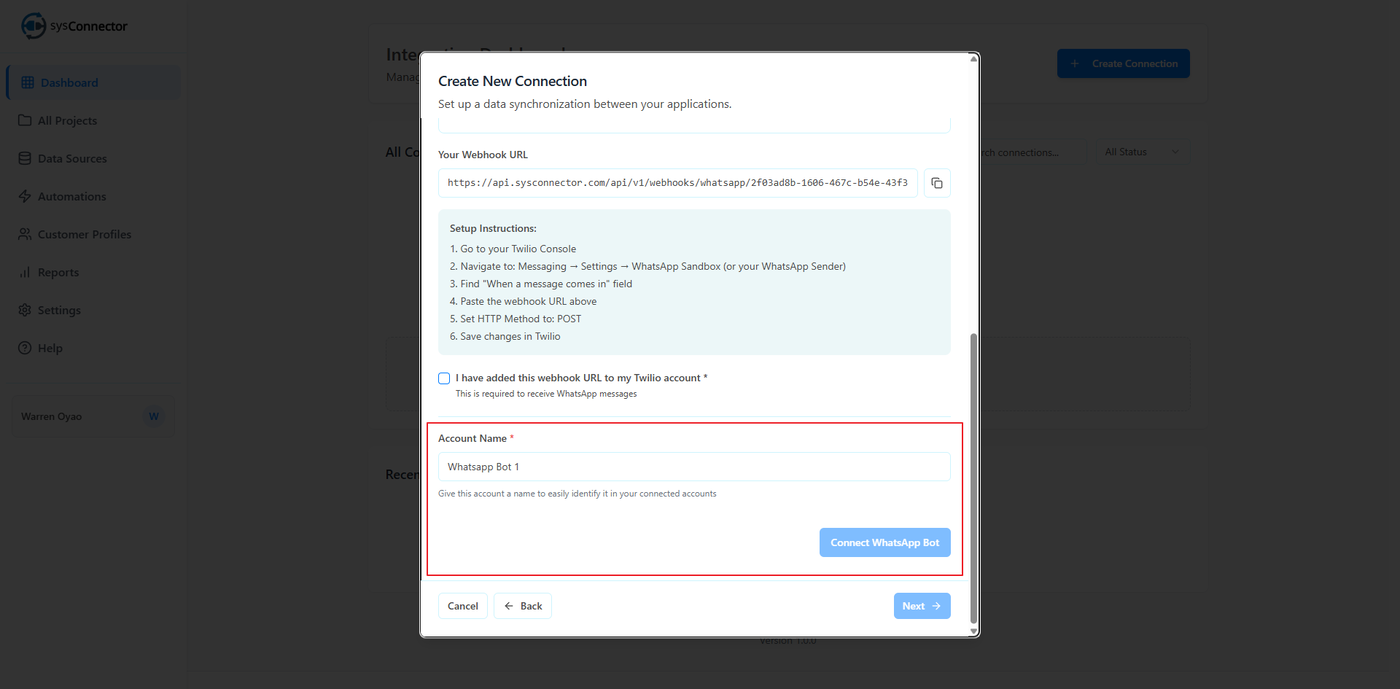
Account Naming
Account Name *
Give this account a name to easily identify it in your connected accounts
Example:WhatsApp Bot Sales
Connect WhatsApp Bot
Click Connect WhatsApp Bot
Once successful, you will see: App Connected – Your WhatsApp Bot has been connected successfully
Click Next to proceed
Step 3: Configure Adobe Campaign as the Destination
Select Adobe Campaign as the Destination App.
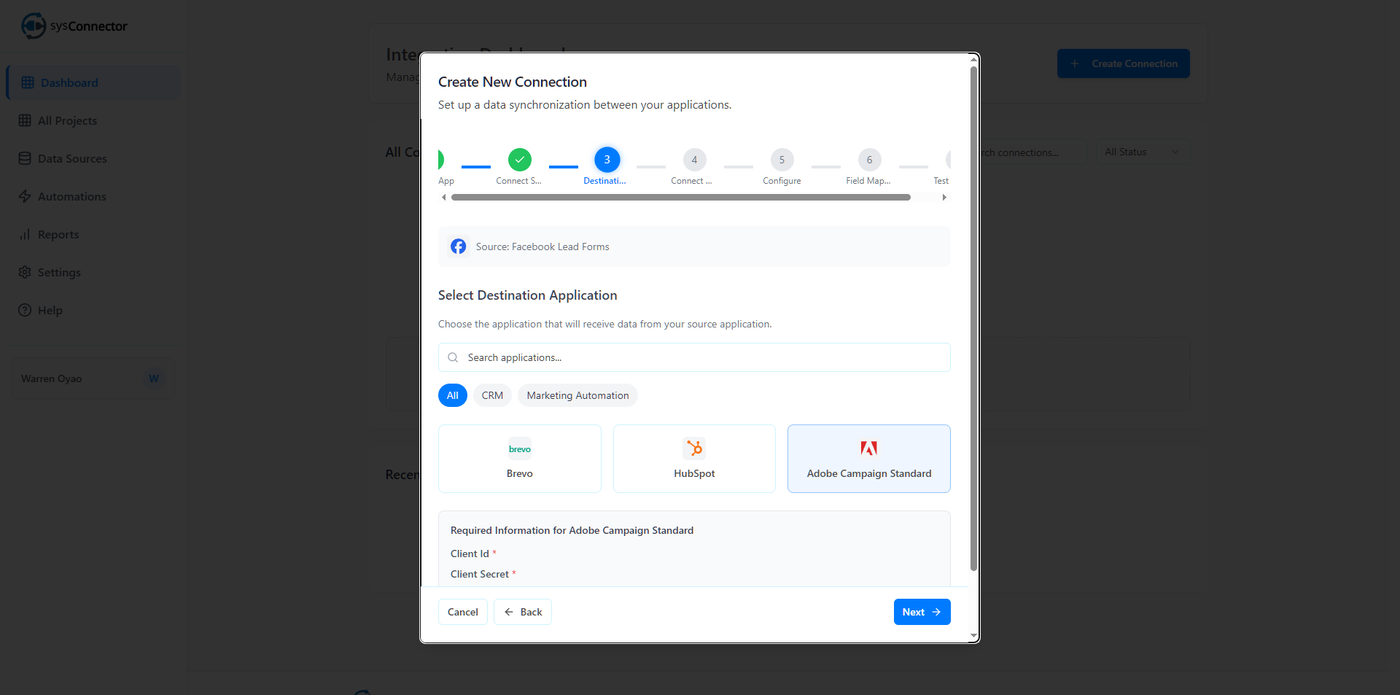
Enter a Destination Account Name
Example:Adobe Campaign Client StagingorAdobe Prod.Enter required credentials:
Tenant ID
Client ID
Client Secret
Click Connect to Adobe Campaign Standard to verify access.
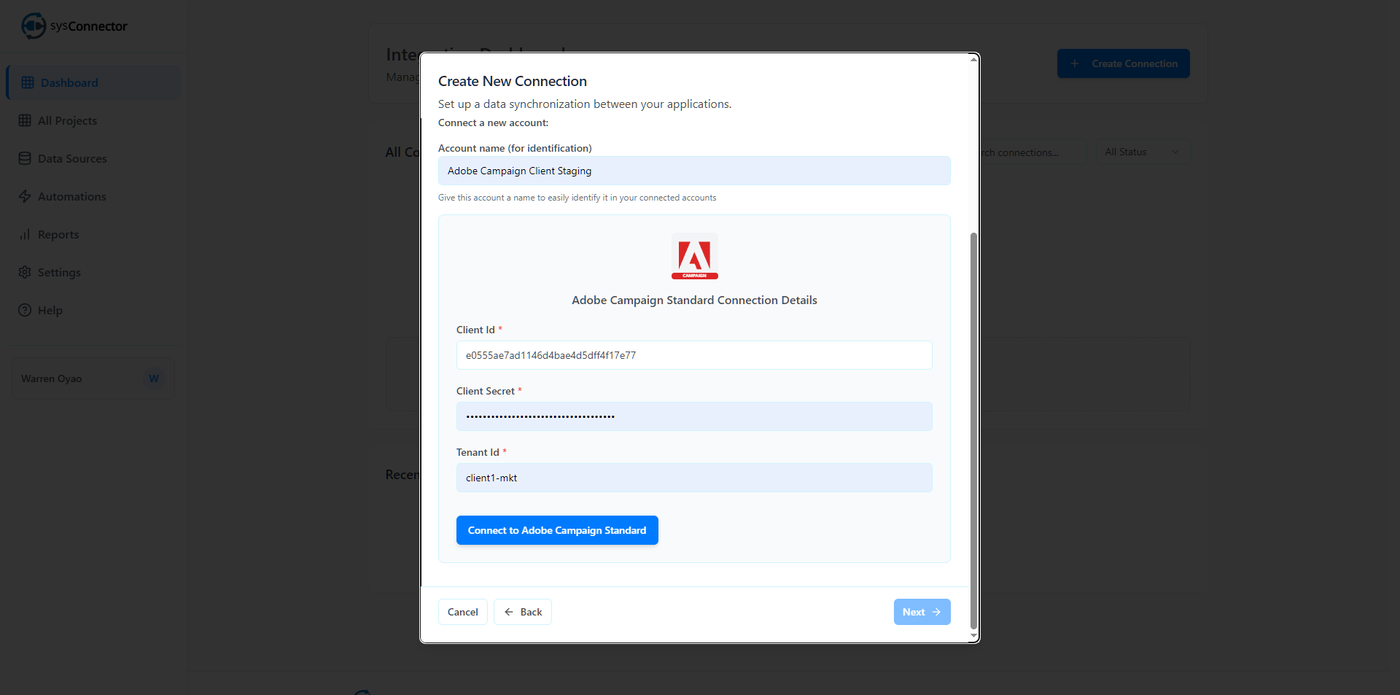
Step 4: Define Connection Settings
Connection Name
Use a clear, descriptive name such as:WhatsApp Lead Sales 2026Project Selection
Choose an existing Project (folder) or use Unassigned.Sync Frequency
Select Event Space to enable real-time syncing when a lead is submitted.
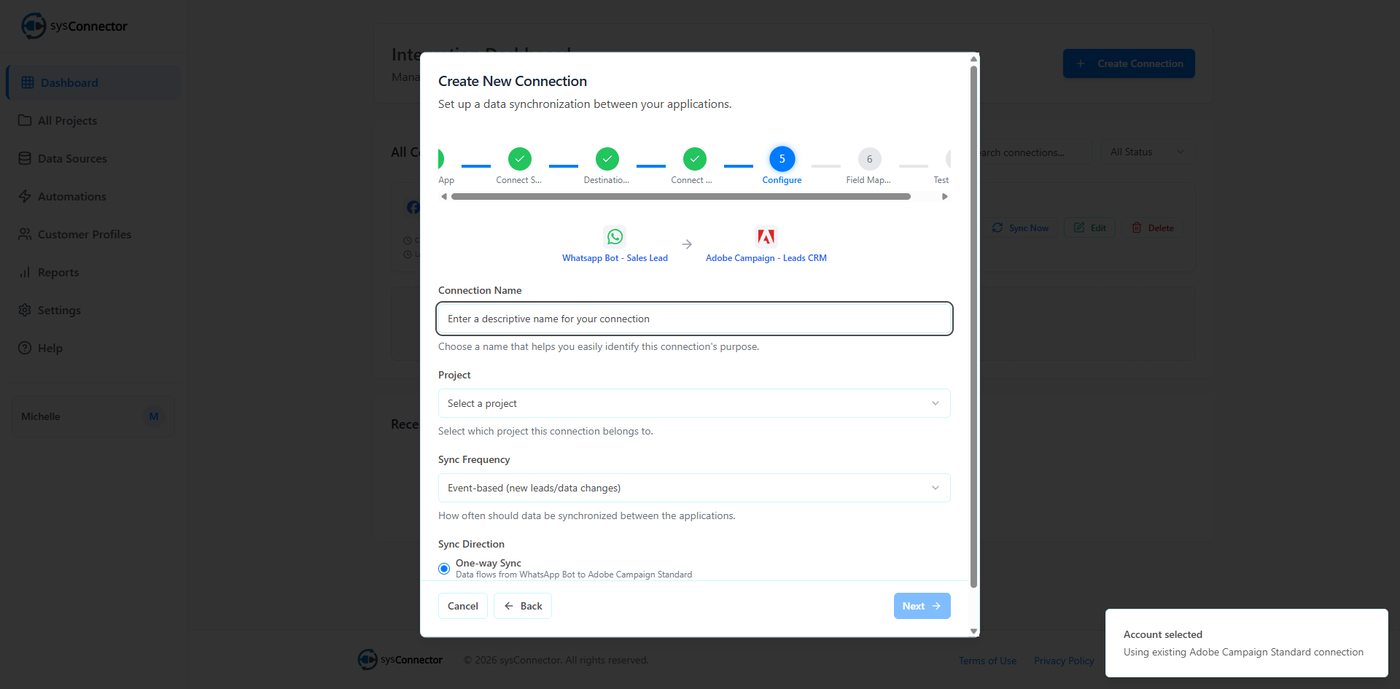
Projects act like folders inside sysConnector.
Select an existing Project, or
Leave it as Unassigned if no structure exists yet
This is especially useful for:
Separating marketing vs sales workflows
Organizing by region or business unit
Controlling user access permissions
Step 5: Field Mapping and Data Transformation
This step defines exactly how data collected in WhatsApp is translated, formatted, and delivered into Adobe Campaign. Proper configuration here ensures clean data, accurate reporting, and successful campaign automation.
5.1 Basic Field Mapping
This section establishes a direct relationship between WhatsApp fields (source) and Adobe Campaign fields (destination).
Process:
For each data point, select the WhatsApp field on the left.
Map it to the corresponding Adobe Campaign field on the right.
Example:
WhatsApp field Name → Adobe Campaign field First Name
WhatsApp field Email → Adobe Campaign field Email
If a required Adobe Campaign field is not mapped, records may fail to sync or be rejected.
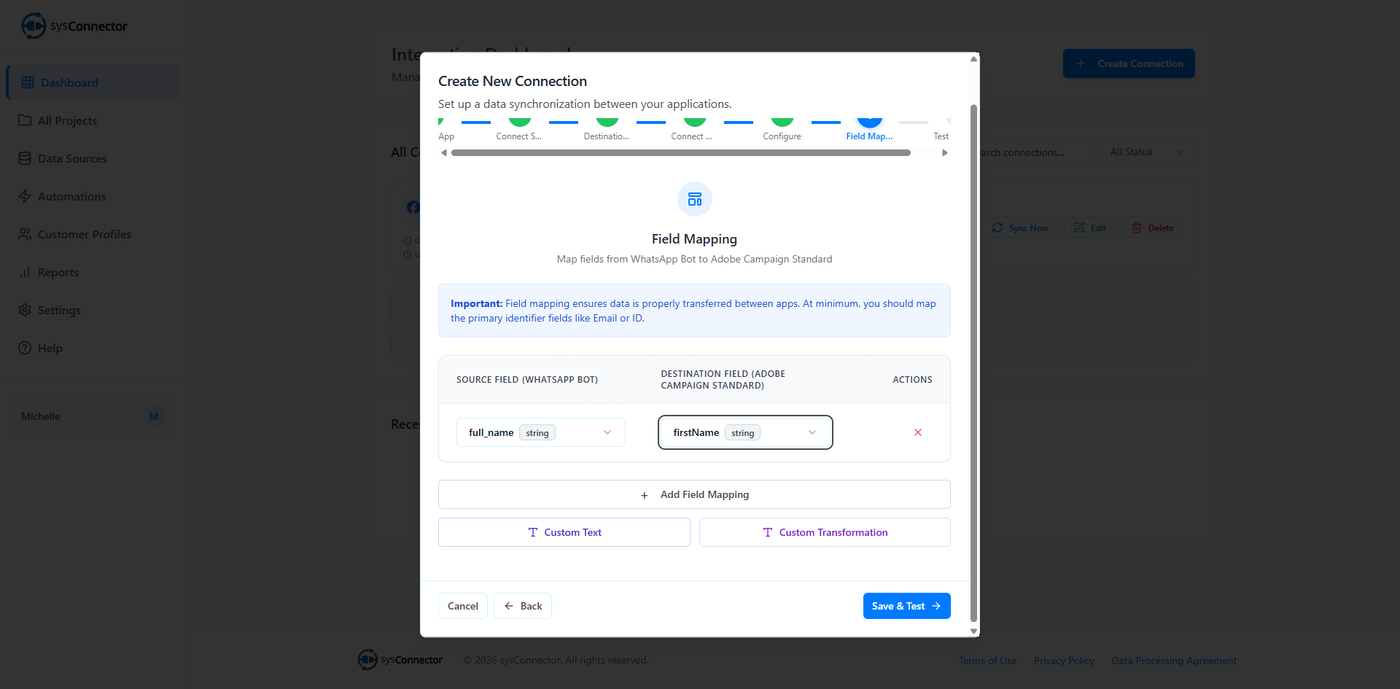
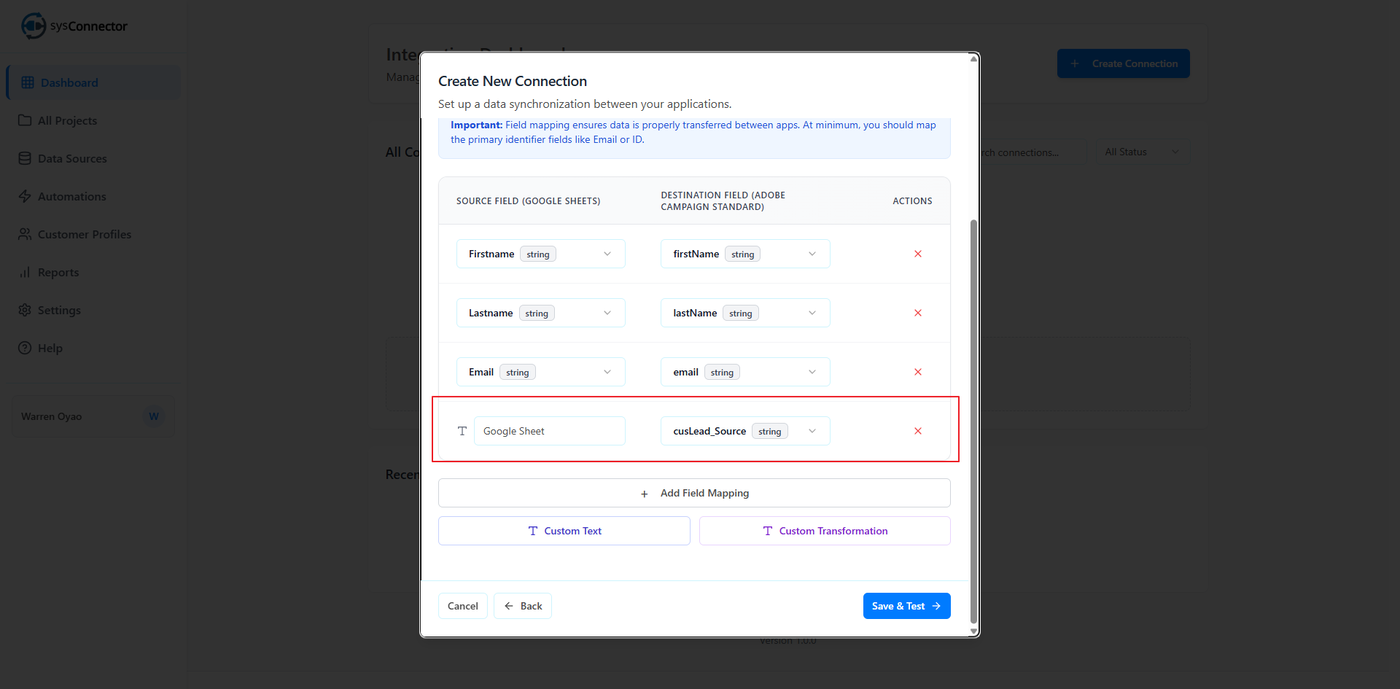
5.2 Using Custom Text
The Custom Text feature allows you to send a fixed value that does not exist in the WhatsApp itself.
Common Use Case:
Create a field in Adobe Campaign called Lead Source
Use Custom Text to automatically populate it with WhatsApp for every lead coming through this connection
This is especially useful for campaign tracking, reporting, and segmentation.
5.3 Custom Transformations (Merging and Formatting)
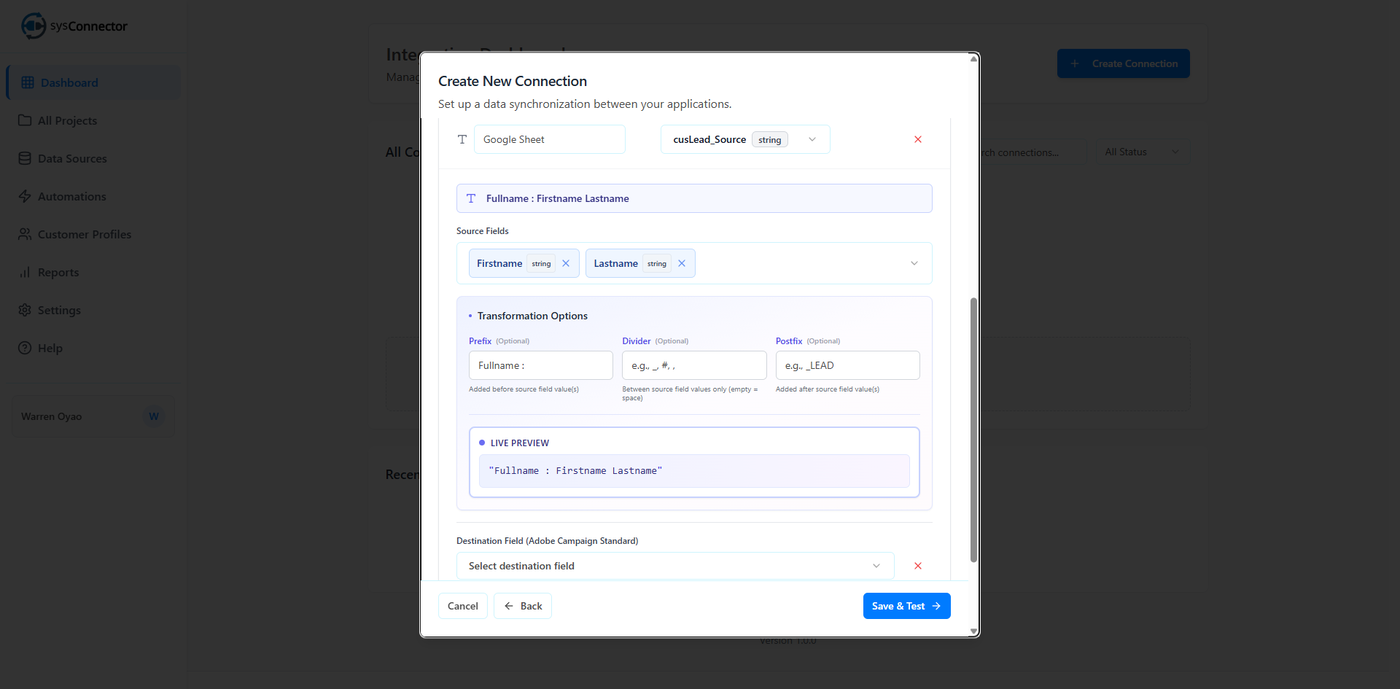
Custom transformations allow you to manipulate or enhance data before it reaches Adobe Campaign, which is useful when the data structures between systems do not align perfectly.
Merge Fields
You can select multiple WhatsApp fields and combine them into a single Adobe Campaign field.
You may apply a divider (comma, dash, pipe, etc.) between values for readability.
Example:
If your WhatsApp contains separate columns for First Name and Last Name, you can merge them into a single Full Name field in Adobe Campaign (e.g., John Doe).
Prefix and Postfix
You can add text before (prefix) or after (postfix) a value.
Example:
Prefix:
WA-Result:
WA-john.doe@email.co
This is useful for tagging, internal labeling, or adding context to incoming data.
5.4 Data Type Conversion
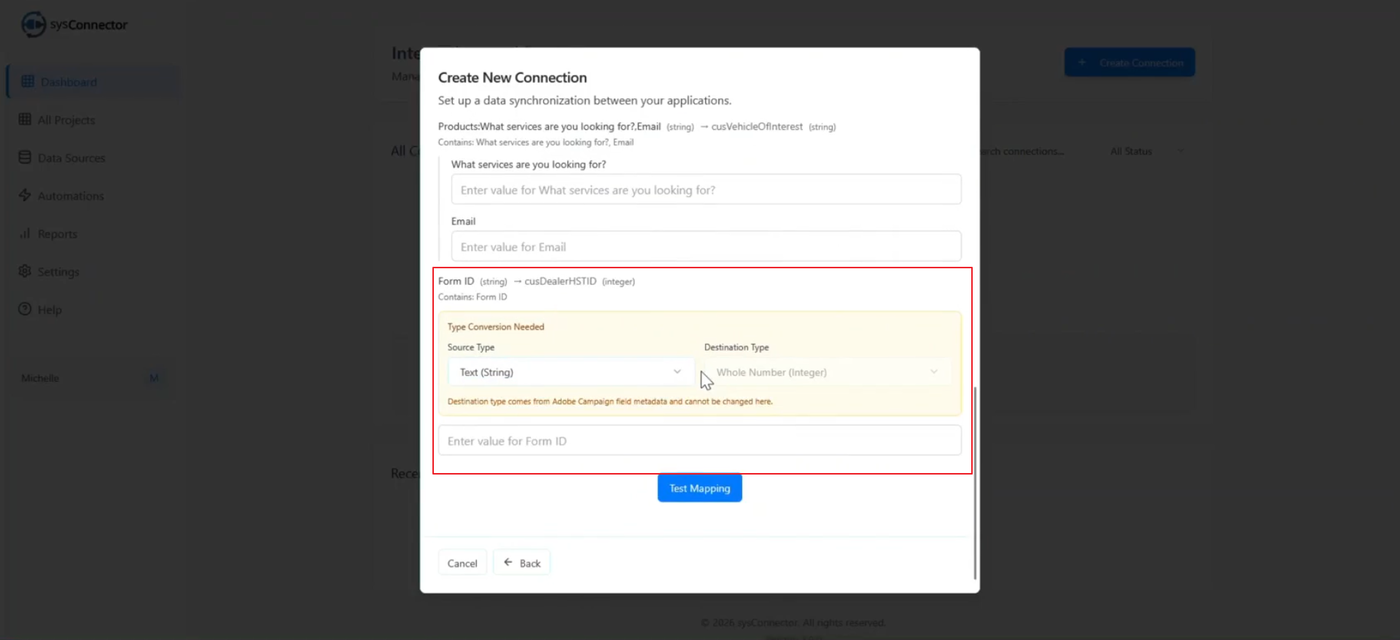
In some cases, WhatsApp sends data in a format that does not match the required data type in Adobe Campaign.
Example:
WhatsApp sends a value as Text
Adobe Campaign requires an Integer
How sysConnector Handles This:
During testing, sysConnector automatically detects mismatched data types.
Since Adobe Campaign field types are fixed, you must adjust the Source Type in sysConnector to match the destination field.
This ensures records are accepted and processed correctly.
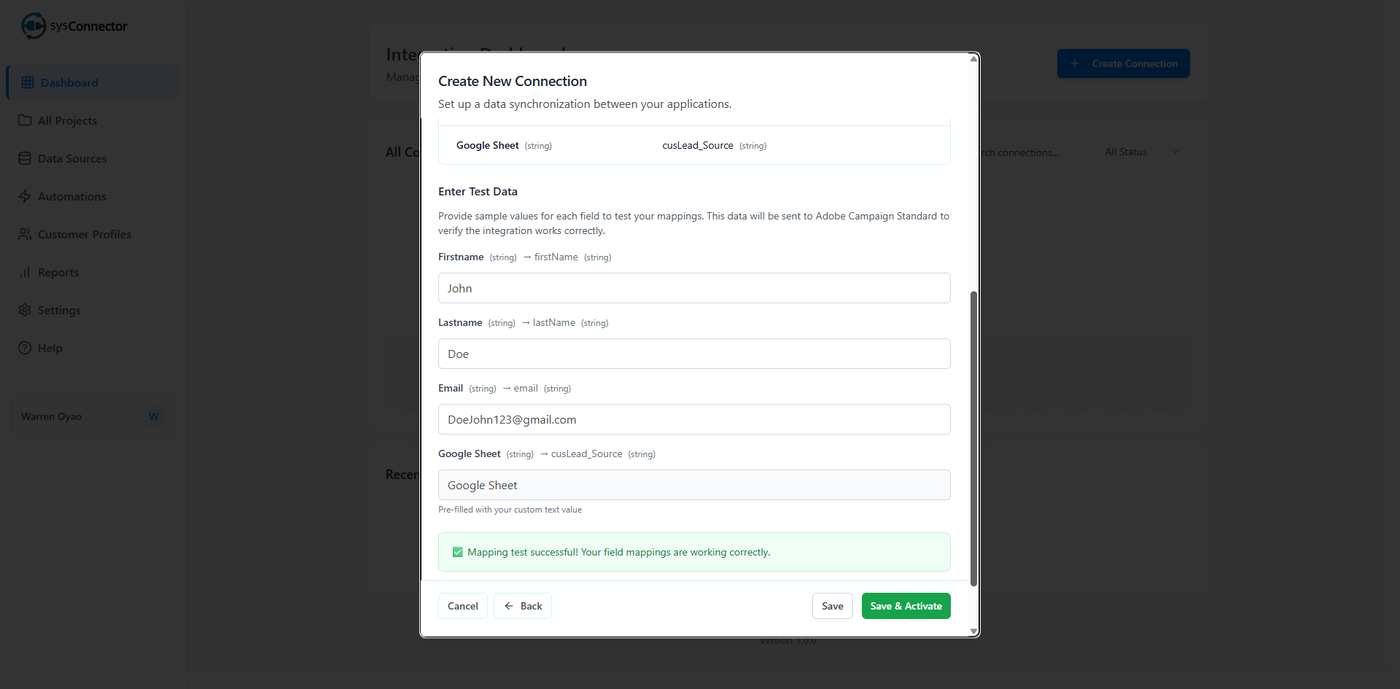
5.5 Mandatory Testing and Validation
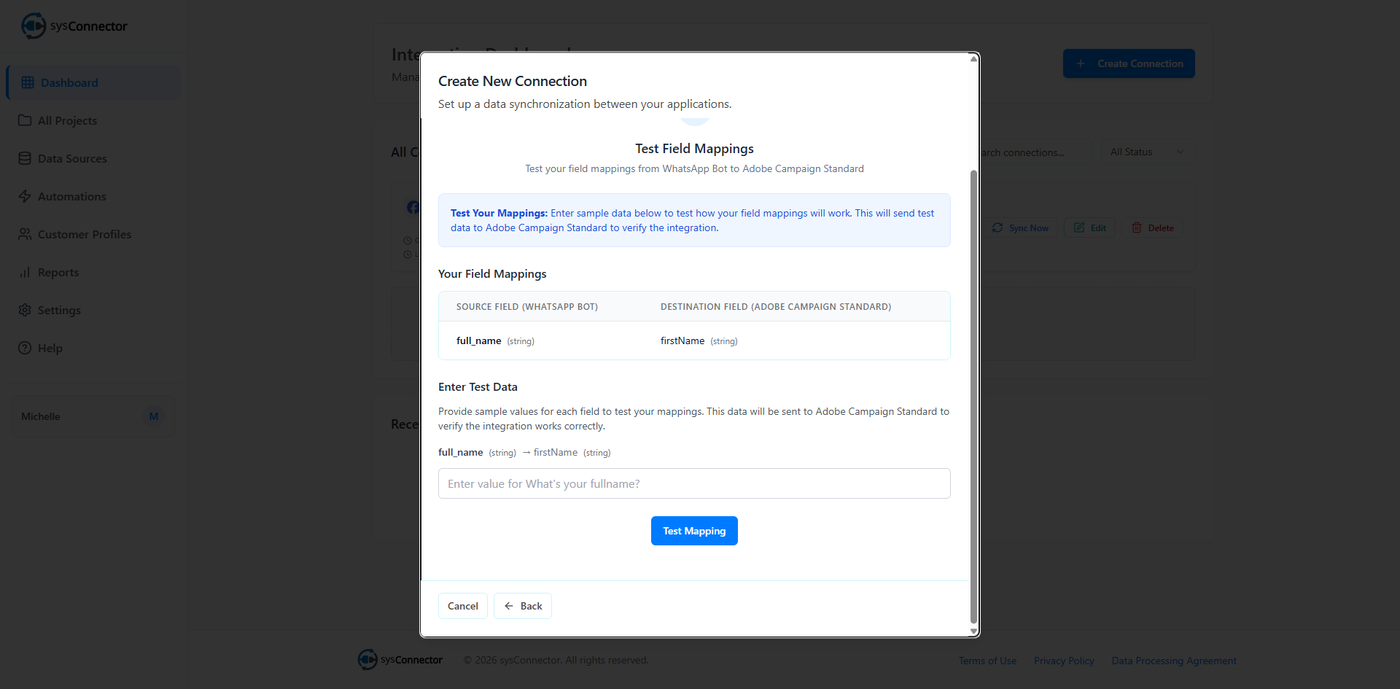
Before a connection can be activated, mapping must be tested successfully.
Process:
Enter sample test data for every mapped field.
Click Test Mapping.
The system validates formatting (e.g., email fields must contain valid email formats).
After a successful test, log in to Adobe Campaign and confirm the test record appears correctly.
Activation is blocked until testing passes.
Step 6: Testing and Activation
Enter sample test data and click Test Mapping.
This step is mandatory before activation.Log in to Adobe Campaign and confirm the test data was received correctly.
Click Save and Activate to begin live syncing.
Managing Your Connection
Monitoring
Go to Reports to view:
Successful lead transfers
Failed sync attempts
Logs from the last 24 hours to 30 days