This article walks you through creating your first connection on the sysConnector platform. We’ll be using Meta (Facebook) Lead Forms as the source and HubSpot as the destination as the example.
Before You Begin
Make sure you have:
Access to your sysConnector account
Admin access to the Facebook Page you want to connect
HubSpot credentials (such as API Key or Private App Access Token depending on your HubSpot setup)
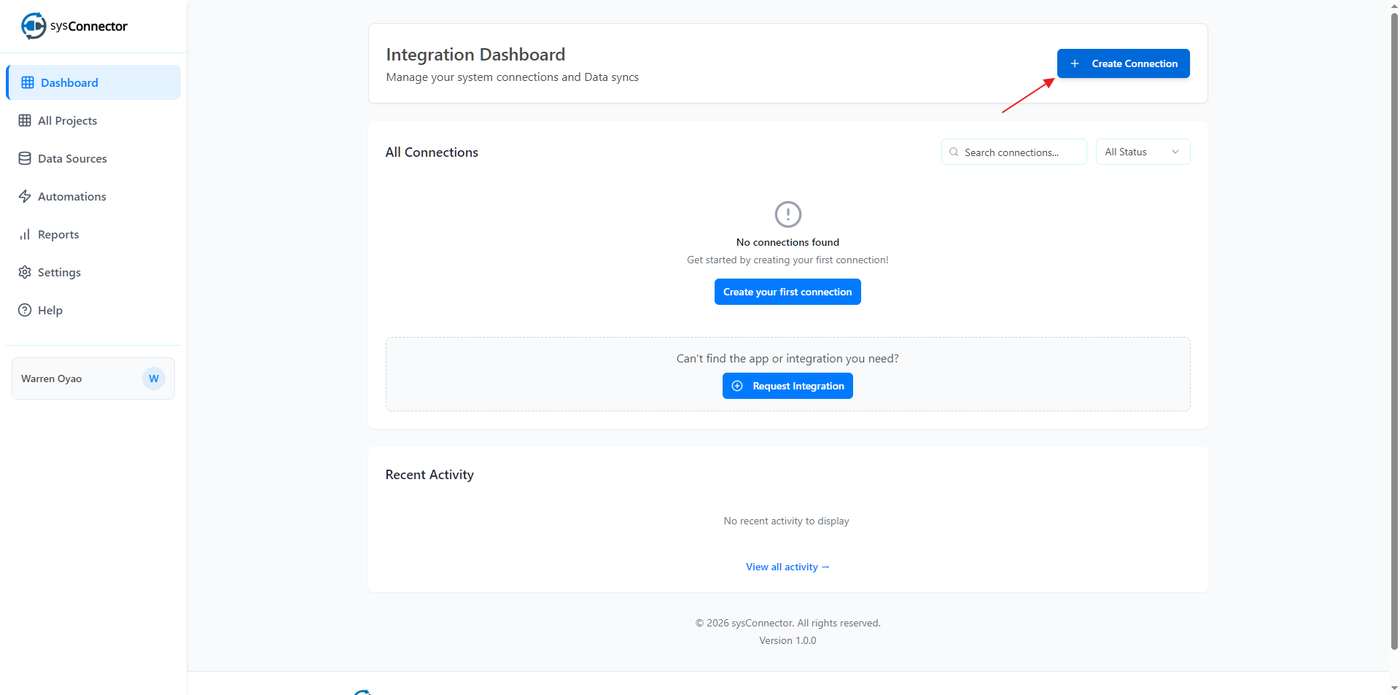
Step 1: Start a New Connection
Log in to your sysConnector Dashboard.
Click either Create Connection button to open the connection setup window.
If your required app is not listed, click Request Integration and submit the details for review.
Step 2: Configure the Source App (Facebook Lead Forms)
Select Facebook Lead Forms as your source application.
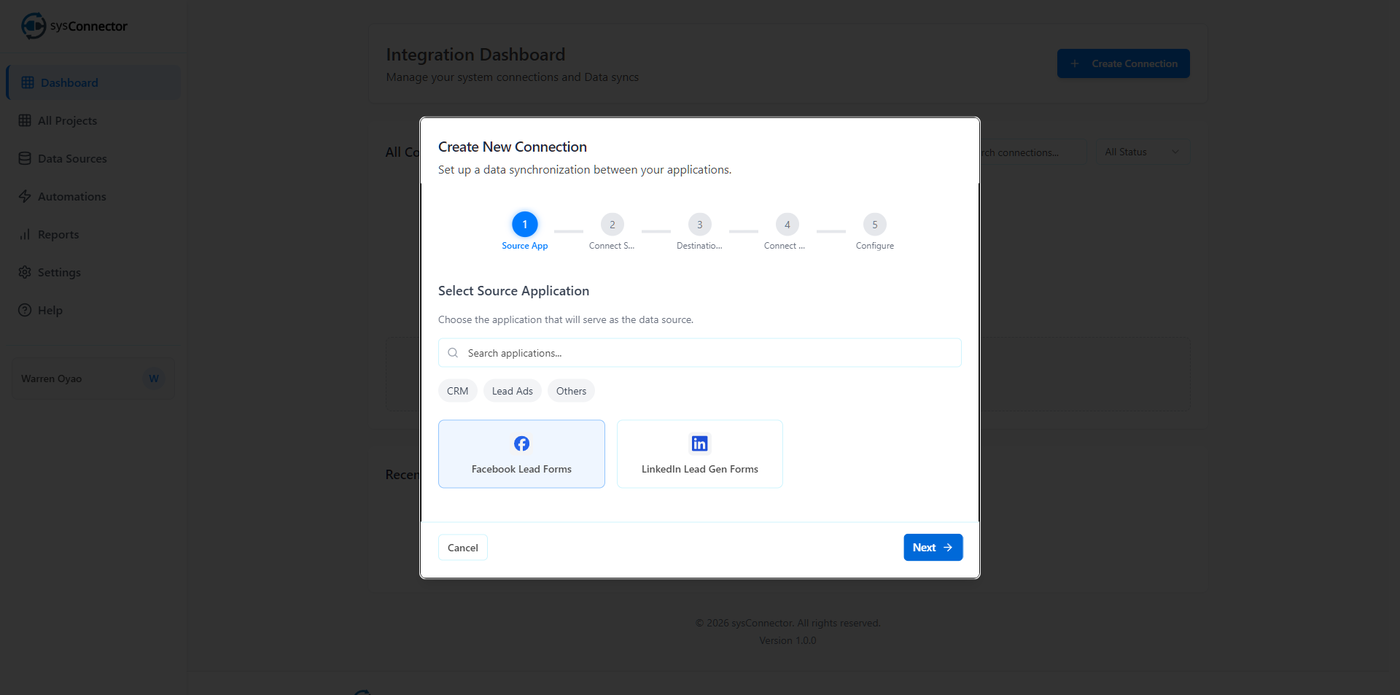
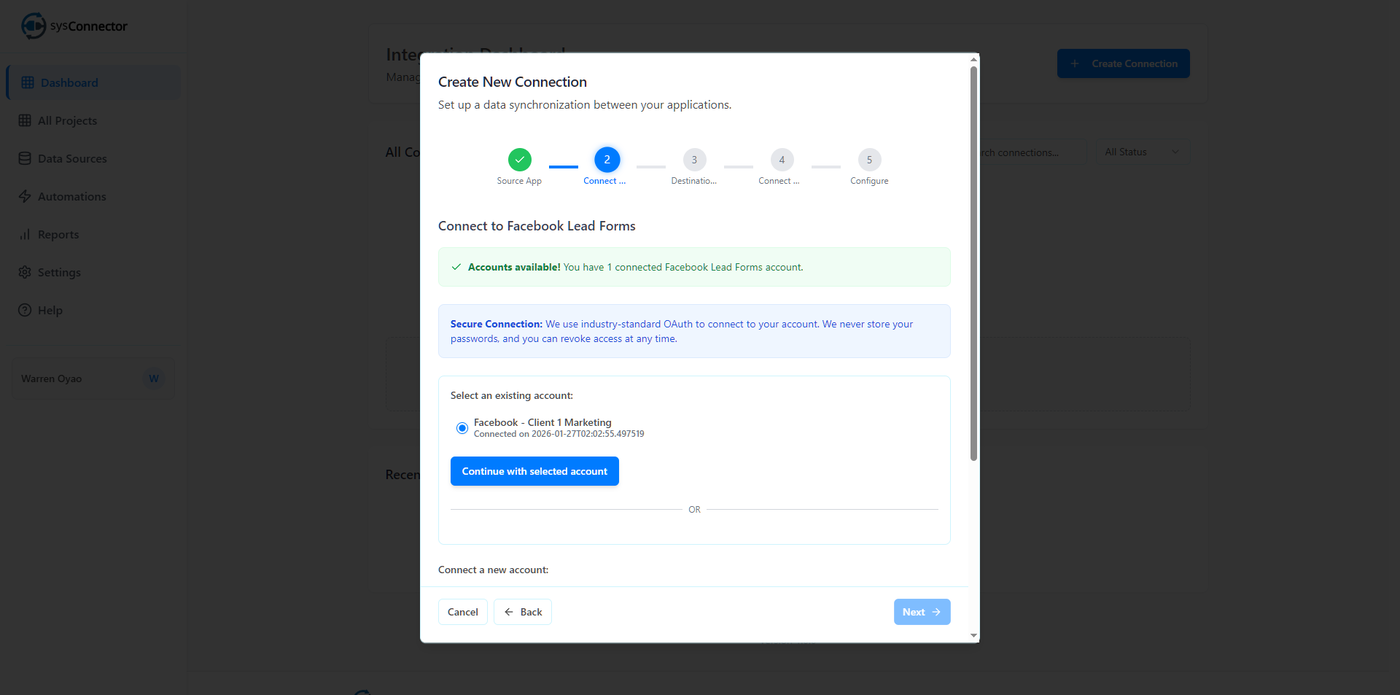
Select an existing account or login to new account.
Enter an Account Name.
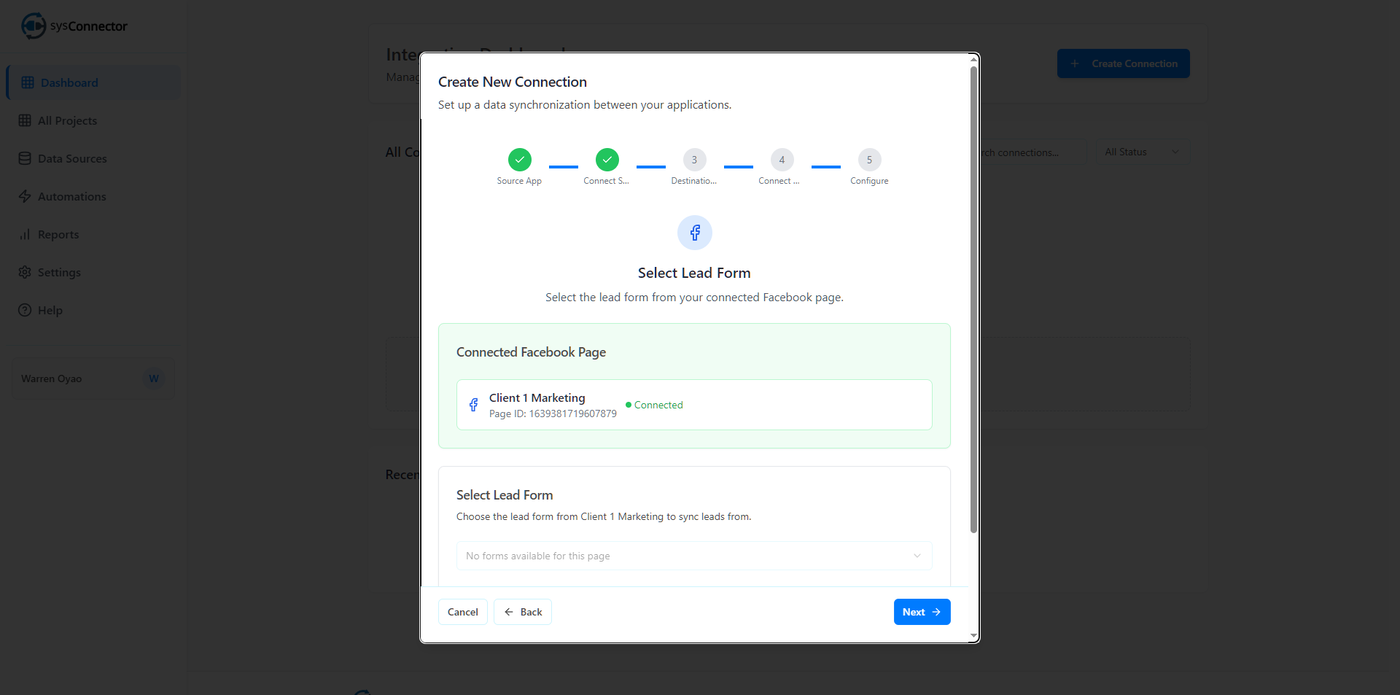
Best practice: Use your Facebook Page name (e.g., Client Marketing X).Click Connect and select the Facebook Page you want to use.
Choose the specific Lead Form from the dropdown to complete setup.
Step 3: Configure the Destination App (HubSpot)
Select HubSpot as your destination application.

Enter a unique Account Name (e.g., HubSpot Production or HubSpot Marketing CRM).
Provide the required credentials:
Private App Access Token (recommended)
Or API Key if your HubSpot account still supports it
Click Connect to HubSpot to verify your credentials.
Once connected, sysConnector will be able to send lead data from Meta Lead Forms directly into HubSpot.
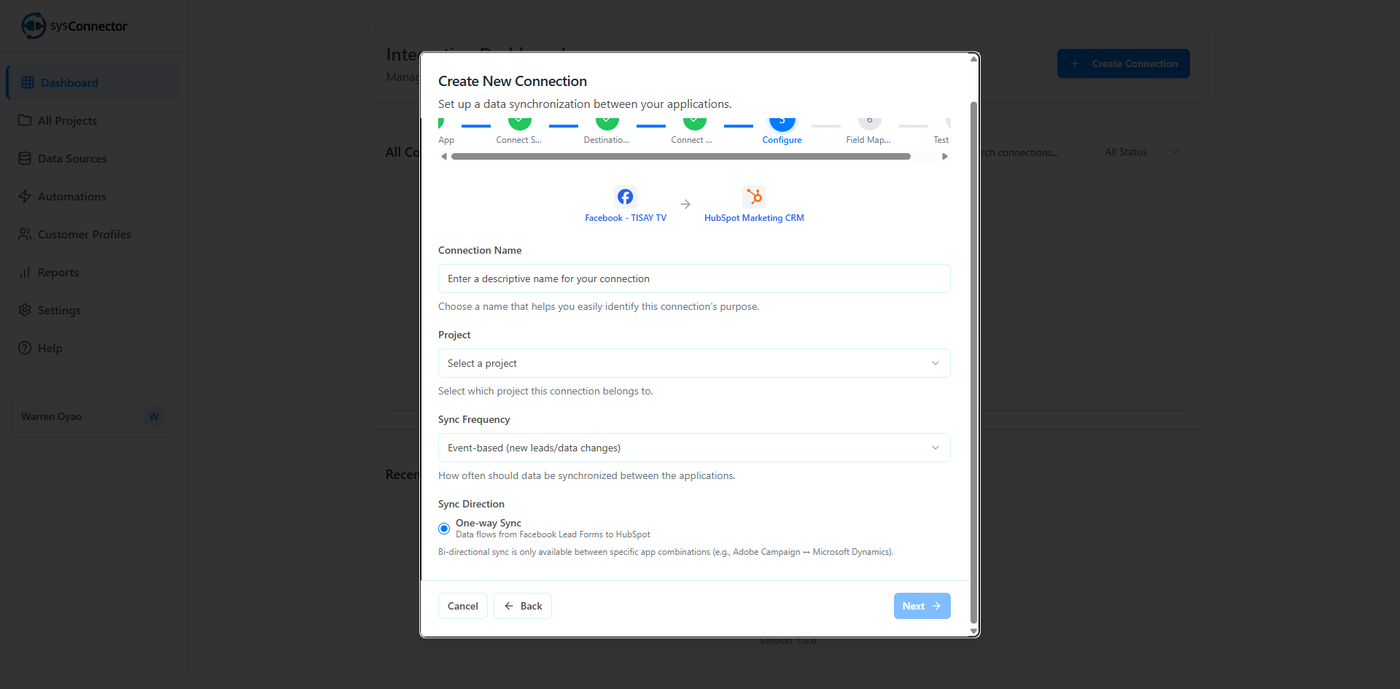
Step 4: Configure Connection Settings
Enter a Connection Name.
Best practice: Use a campaign-specific name (e.g., 2026 Product Launch Campaign).Assign the connection to a Project.
If none exists, use the default Unassigned project.Set Sync Frequency to Event based to enable real-time lead syncing.
This ensures that new leads submitted through Meta Lead Forms are immediately sent to HubSpot.
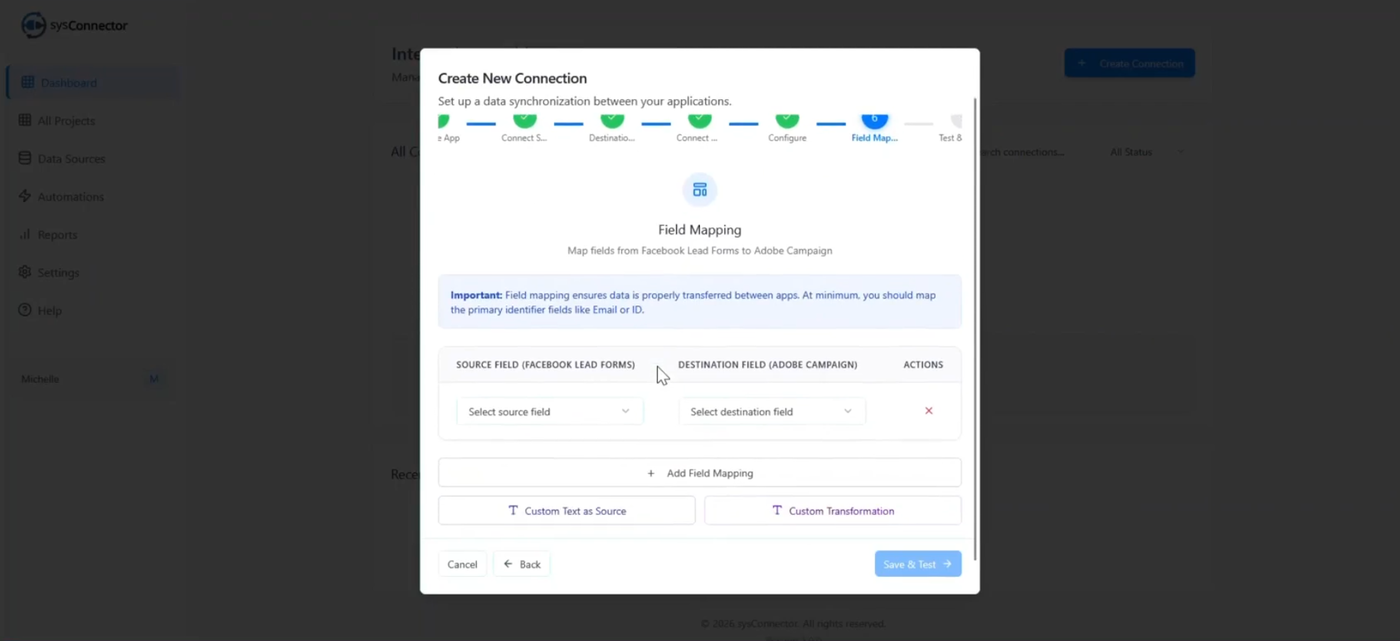
Step 5: Map Fields and Apply Transformations
Match Facebook fields to HubSpot contact fields
Example mapping:
Facebook Field | HubSpot Field |
|---|---|
First Name | First Name |
Last Name | Last Name |
Phone Number | Phone Number |
You can also:
Use Custom Text to send fixed values (such as Facebook) for source tracking.
Apply transformations if needed:
Merge Fields
Combine multiple source fields into one destination field.
Type Conversion
Change the source field type if it doesn’t match the destination requirement.
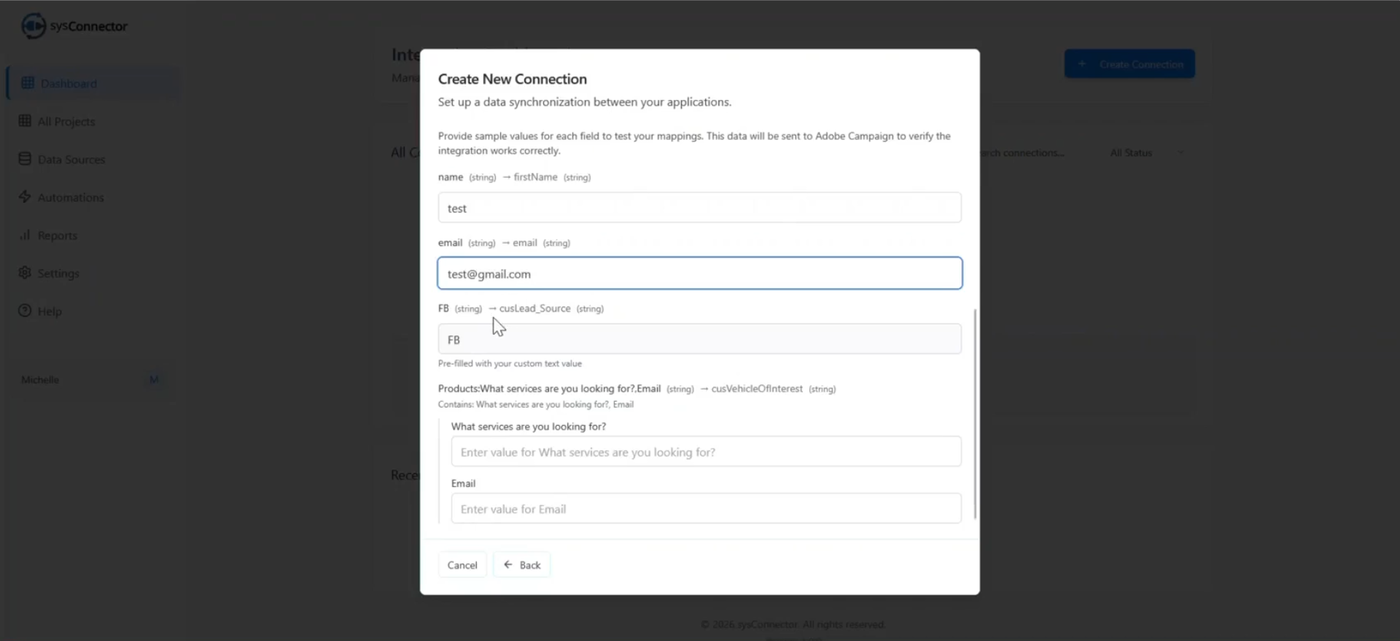
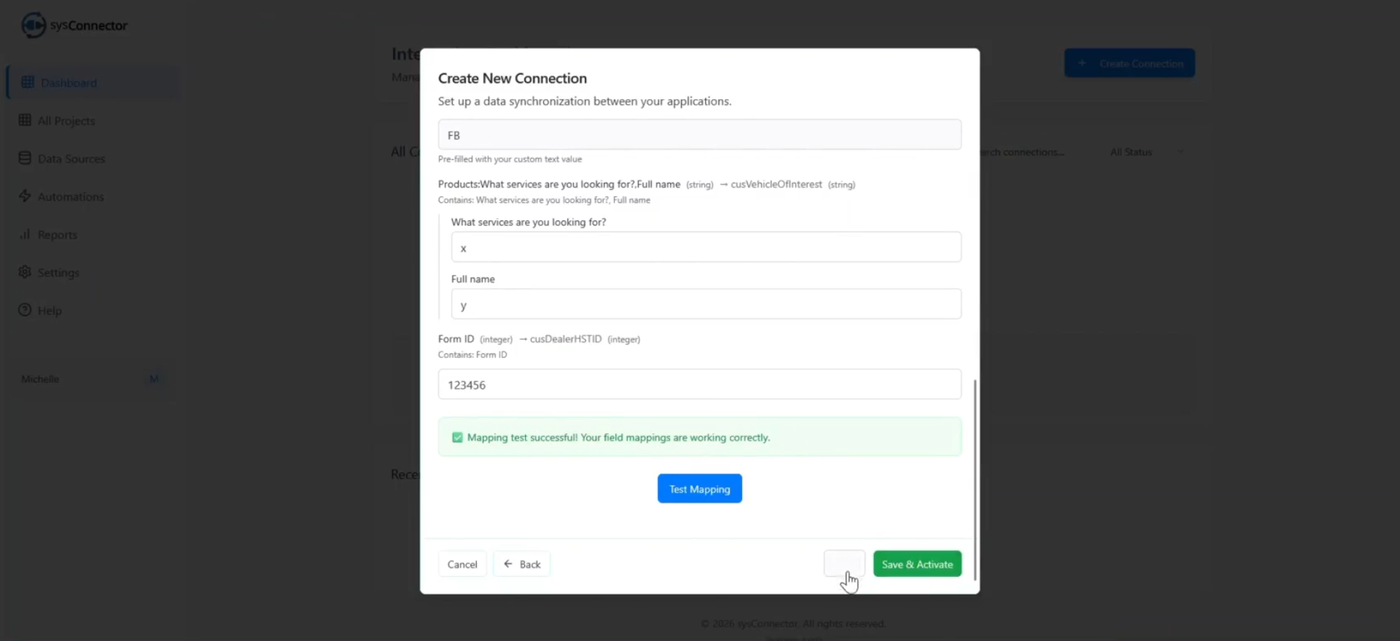
Step 6: Test and Activate the Connection
Enter sample data and click Test Mapping.
Activation is disabled until testing is completed.Log in to HubSpot to confirm the test data was received correctly (usually created as a Contact record).
Click Save and Activate to start real-time syncing.
Go to Reports to monitor successful and failed data transfers.
Related Tips
Use clear, campaign-based naming conventions to make connections easier to manage.
Always test mappings before activating to avoid production data issues.
Check the Reports section regularly to monitor sync health.